skip to content
Eden Succulents
Learn About the Types of Echeveria and How to Care for Them

Learn About the Types of Echeveria and How to Care for Them

Echeveria is a type of succulent that has been altering the idea of conventional houseplants. It is one of the most widespread kinds of succulents all around the world and a favorite among succulent growers, and it’s not hard to see why. Echeverias are exotic and effortlessly stunning.

Because of the plant’s popularity, many people are curious to learn how to grow this succulent so they can start their own collections.

What is an Echeveria?

Echeveria succulents are members of the Crassulaceae family and are native to Central America, Mexico, and South America. They are generally referred to as Mexican Hens and Chicks.

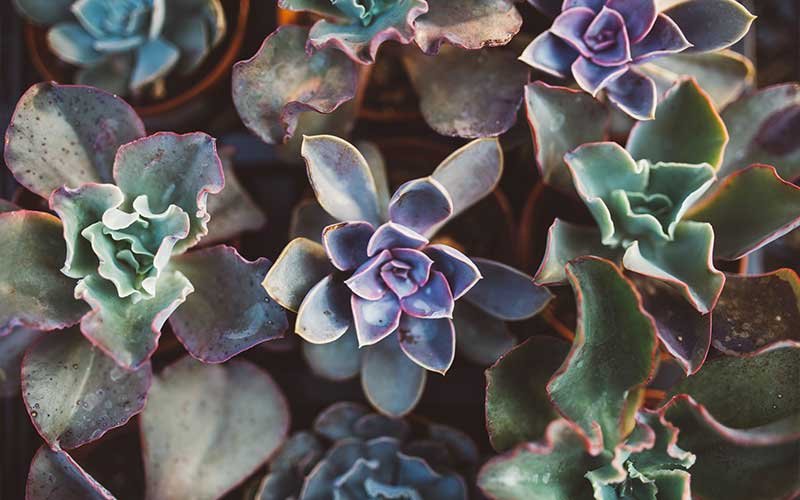
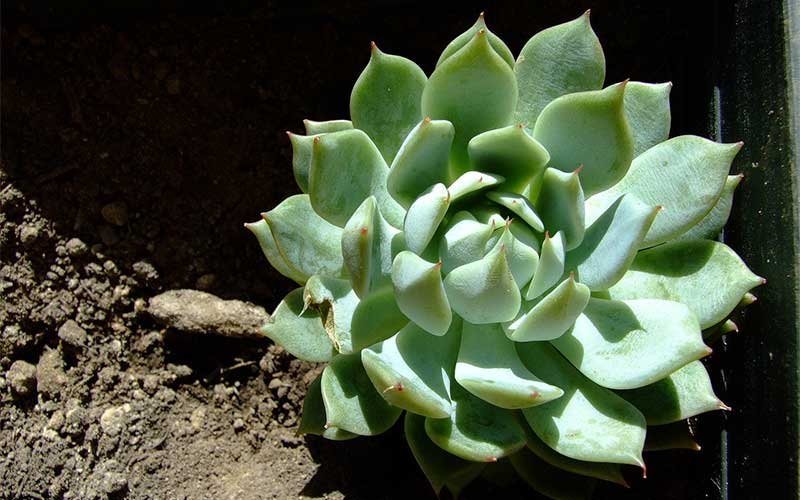
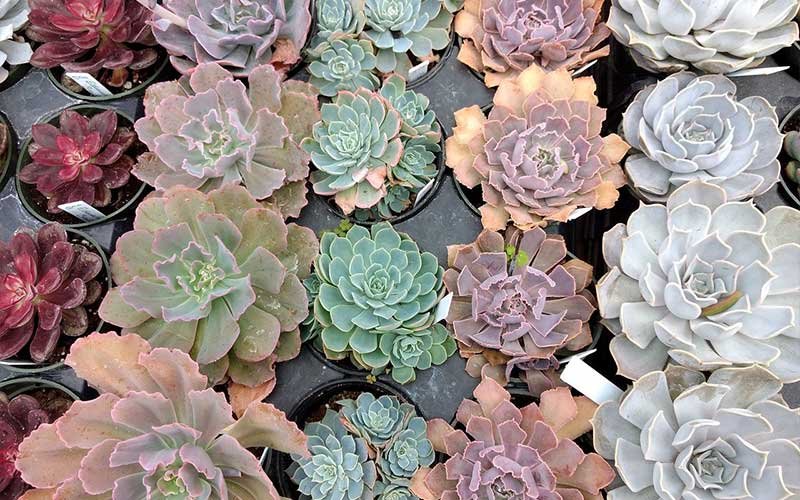
Echeveria has fleshy leaves that grow around a central stalk, forming a rosette shape. These leaves are the plant’s water storage, which was developed to adapt to the climate in their natural habitat. The color of the leaves ranges from the palest white to the deepest purple, and everything in between. Red or purple hues sometimes appear on the edges of their usually blue-green/dark green leaves. The leaves vary from thin to thick, and smooth to furry.

The genre was named after Atanasio Echeverria y Godoy, an 18th-century botanical artist who documented several species of Echeveria in Central Mexico.

Echeveria Types

There are nearly 200 species of the Echeveria genus, and more hybrids are still being discovered and added to the list. Here are some of the most popular Echeveria types you can buy and care for:
  • Echeveria Agavoides
  • Echeveria laui
  • Ehceveria peacockii
  • Echeveria elegans
  • Echeveria setosa
  • Echeveria lilacina
  • Echeveria lola
  • Echeveria black prince
  • Echeveria neon breaker
  • Echeveria fleur blanc

How Big Does Echeveria Grow?

The rosettes of Echeveria can grow around 5-15 centimeters wide and can grow no taller than 5-10 centimeters. If the Echeveria becomes too big and its size causes a problem to other plants in an arrangement, you can cut the top off and propagate it.
How Big Does Echeveria Grow?

Is Echeveria an Indoor or Outdoor Plant?

Echeveria succulent plants make for great ground covers, especially if you have a rocky garden. If you’re planning to grow your Echeveria outdoors, make sure they get a temperate climate throughout the whole year. Unlike some succulents, Echeverias are not very tolerant of cold climates, and a sudden drop in temperature can cause damage to your plants. If your area experiences extreme winter conditions, plant your Echeveria in containers so you can take them indoors when the temperature becomes colder.

One of the main concerns of Echeveria growers when considering taking their plant indoors is whether the plant will receive the amount of sunlight that it needs to survive. The key is to choose the best spot in your home where your Echeveria can get the proper light and humidity it needs. You might need to move your Echeveria a couple of times around your house to find the best spot for it.

Light Requirements

Echeveria succulents were discovered growing naturally in warm climates where they get lots of sun, and they have adapted to this kind of warm and bright environment. The Echeveria species and most of its hybrids have the same light needs.

Even though Echeveria enjoys bright light, we do not recommend putting your plant under the direct, full sun, especially in the summer. Exposure to full sun for extended periods can cause stress and sunburn to your plants.

Before taking them outdoors for the first time after a long period of keeping them indoors during the colder months, make sure to acclimatize your Echeveria first. You can do this by putting them in an area where they can get morning sunlight for a few hours every day. Gradually increase their sun exposure until they are fully acclimated to the full sun. Avoid exposing your plants to the afternoon sun because it can burn their leaves and stress them.

In the winter, place your plant beside a bright window. Choose a south-facing window to ensure that your plant receives the amount of light it requires. You can also grow your Echeveria under grow lights if you think that not enough sunlight enters your home.

Temperature Requirements

Echeverias can tolerate a range of temperatures, but there are differences in the level of tolerance between varieties and hybrids. Most Echeverias enjoy a relatively warm and dry climate. They prefer colder temperatures at night and warmer temperatures during the day. In winter, Echeverias can tolerate 4-6 degrees Celsius at night and up to 15 degrees Celsius during the daytime.

During summer, they can survive quite high temperatures, especially if they are inside greenhouses. If the temperatures go over 30 degrees Celsius, we recommend that you use a sunshade to protect your Echeveria from the intense heat. Most plants, including Echeveria, shut down and close their stomata when the temperature goes above 30 degrees Celsius. They start breathing again when the temperature drops during night time.

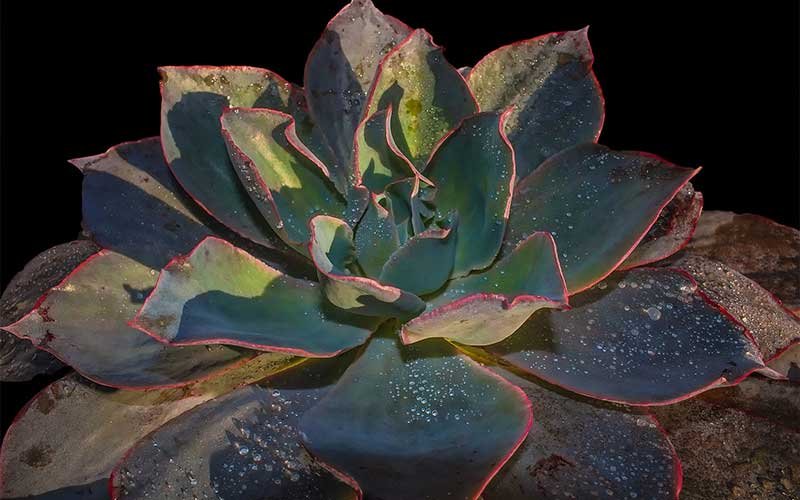
Echeveria plants have a powdery wax coating on their leaves called farina, which functions to control water loss and in keeping the leaves clean.

Water Requirements

Water Requirements
Watering your Echeveria depends on the climate you live in. While these plants are highly tolerant of drought, they will appreciate getting sufficient amounts of water. They may be hardy, but they are still living plants.

There is no formula in watering Echeveria. A good rule to follow is the old soak and dry method. Only water your Echeveria once the soil is dried up, but pour in a significant amount when you do. Drench your plant with water until the soil is thoroughly wet. If your Echeveria is in a container, keep the water running until water comes out from the drainage holes. Water it again when the soil has completely dried up.

Soil Requirements

Like all succulents, Echeveria plants do not like sitting in wet soil for too long, so it’s essential to use a fast-draining soil. Excess moisture can cause the rotting of the roots. If you want to make your own succulent soil, combine equal parts of the cactus potting mix and perlite. Avoid using fine sand as it can clog up the soil. You can purchase some ready-to-use succulent soil mixes here.

Fertilizer Requirements

Echeveria plants don’t require fertilizers, but feeding them every two weeks can give them the nutrients they need to grow properly and produce flowers. The best time to fertilize your Echeveria plants is during their growing season, or in the spring and summer. Choose a well-balanced blend of fertilizer for houseplants or a fertilizer specially formulated for cacti and succulents. Make sure to use a diluted fertilizer like this.

Pot Requirements

Terra-cotta clay pots are the most suitable containers for your Echeveria plants. These pots are made with materials that allow moisture to escape, leaving the soil dry the way your plant wants it.

Pot Requirements
It’s no wonder why Echeverias are among the more popular succulent varieties. They’re gorgeous with their varying colors and shapes, and they give the most beautiful blooms during late summer. You can also grow them easily both indoors and outdoors.

Now that you learned about the most common Echeveria types and how to care for them, it’s time for you to grow them. Don’t forget every little detail we shared in this article to make sure that you help your plant thrive. Get your first Echeveria succulent plant here.

Giixer 1000W LED Grow Light, Dual Switch & Dual Chips Full Spectrum LED

Giixer 1000W LED Grow Light, Dual Switch & Dual Chips Full Spectrum LED

New Upgrades: Compare with the traditional 1000 watt grow lamps, this new Dual-Chips 10w led lights is bigger, brighter and efficient, but consuming only 110 watts.
Home-Complete Walk-In Greenhouse- Indoor Outdoor with 8 Sturdy Shelves

Home-Complete Walk-In Greenhouse- Indoor Outdoor with 8 Sturdy Shelves

8 DURABLE SHELVES- The 8 sturdy shelves provide plenty of room for trays, pots, or planters of anything you want to grow. It’s a convenient option for any gardener!
Hoffman 10404 Organic Cactus and Succulent Soil Mix

Hoffman 10404 Organic Cactus and Succulent Soil Mix

  • Organic cactus and succulent soil mix
  • Professionally formulated for use with both jungle and desert cacti
  • Provides the drainage cacti need to flourish; ready to use; pH balanced
  • Complete package directions provide useful growing information
  • This product measures 4 quarts
Bloem Terra Pot Planter 6" Terra Cotta

Bloem Terra Pot Planter 6" Terra Cotta

  • Capacity: 0.5 Gallons / Size: 6.5 in. Top width x 4.5 in. Bottom width x 5.5 in. Height
  • Matte finish is perfect for resisting scratches, dirt, and fingerprints.
  • Includes drainage holes to help protect against overwatering.
  • All-weather resin durability with UV stabilized protection.
  • Floor Planter Type-Individual Floor Planters
Common Succulent Problems You May Encounter and How to Solve These

Common Succulent Problems You May Encounter and How to Solve These

Succulents are valued for their beauty and ability to withstand harsh conditions. They have unique qualities that help them grow and thrive even with minimal care, but like other plants, they are not immune to problems. However, they do show symptoms when they are unhealthy, so you’ll know if it’s time to change something in their environment or in the way you care for them.

If you’re unsure whether your succulent is behaving normally or is telling you that it needs more attention, the information below will help you spot signs of problems with your succulents and give tips on how to troubleshoot them.

Common Succulent Problems

Leaves are Falling Off

The most common reason for the leaves of your succulent to fall off is issues with watering. Overwatering can cause the leaves to swell, become soft and mushy, and fall off. The stem of an overwatered succulent will look puffy, while the leaves will appear wet and sloppy.

Solution: Refrain from watering your plant until the top inch of the soil is dry. Make sure the potting mix is fast-draining, and the pot has enough drainage holes, so your plant doesn’t sit on water for too long. If you are using the wrong potting mix, switch it out with a fast-draining soil mix. If your pot doesn’t drain well, drill holes into it or change the frequency of watering.

The leaves can also off when the weather is scorching. When there is intense heat or drought, succulents adapt by dropping their leaves so they can conserve energy and preserve their water supply. This is your succulent’s natural response to the stress in its environment, but there are things you can do to minimize its effects on your plant.

Solution: Move your plant away from full, direct sunlight during a heatwave or drought. Also, consider watering it more frequently than usual under these conditions. Water your succulents once you notice that the top inch of the soil is parched.

Yellow Leaves

Yellow Leaves
Leaves can turn yellow because of overwatering or underwatering. Observe your plant for other signs of problems. If you are regularly watering your plant but its leaves are turning yellow, and becoming swollen and mushy, your plant is overwatered. If the leaves are turning yellow, shriveling and wilting, and you know that you haven’t watered it in a while, then your succulent is likely underwatered.

Solution: Change your watering techniques. If your plant is overwatered, make sure the soil is already dry before you water it again. If it is underwatered, increase the amount of water you give and be sure to drench it thoroughly when you water it. Most succulents enjoy a good drench until excess water drips out of the potholes. Water it again when the soil dries out.

Leaves can also turn yellow because of the lack of nutrients. Most succulent soils sold in stores contain fertilizers that your plants can feed on for some time, but as time goes by, these nutrients are flushed out of the soil due to watering.

Solution: You can add more nutrients by adding fertilizer to the soil. Use a fertilizer designed for houseplants or specially made for succulents. Succulents do not need a lot of fertilizers. Half of the recommended amount will do. Fertilize your plants once every two weeks during the growing season, and don’t fertilize them when they are dormant. If you are going to replant your succulent, make sure you use a well-draining pot with a fresh soil mix.

Withered or Shriveled Leaves

Underwatering is the leading cause of withered leaves in succulents. If the leaves appear wilted, which usually starts from the top of the plant, then the plant needs more water.

Solution: Underwatering problems are easy to troubleshoot. Water the plant more thoroughly and frequently. Increase the frequency during drought or heatwave. Water your plant until the water starts dripping from the drainage holes of the pot. Water it again when the soil becomes dry.

Withered or Shriveled Leaves

Brown Leaves or Brown Spots on Leaves

If the leaves of your succulents are turning brown or if you see brown spots on them, they are likely sunburned. Sunburn can happen if your plant is exposed to too much direct sunlight, or if there was a sudden change in its sun exposure.

Remedy: Move the plant to a shadier location, especially during a heatwave. Before you move a plant to a sunnier spot, make sure to acclimatize it first. Gradually increase the sun exposure to prevent sun damage. Do not place newly propagated plants under the full sun, so they don’t get scorched.

Stunted Growth

If you do not see new growth in your plant, it may be getting insufficient light. Plants that do not receive sufficient light will not grow well. They will stretch out and will not produce any new growth.

Solution: Move your plant to a location with better lighting. Be careful not to shock your plant by suddenly moving it form low light to full sun. Acclimate your plants to avoid sun damage. Observe how your plants are reacting to the adjustments, and adjust accordingly.

Lack of nutrients may also stunt your plant’s growth. If your plant has been on the same pot for more than a year, it may be time to transfer it to a new container with fresh soil mix or time to fertilize.
Solution: Re-pot the plant in a new soil mix, or add minimal fertilizer once every two weeks during the growing season.

Whether or not your plants will survive these problems depend on the extent of damage and how immediately you troubleshoot them. The best way to gauge the extent of damage is to examine your plant from top to roots. If you see enough roots that are still viable, then your plant can survive if you care for it properly. But if all the roots have dried up and turned black, the survival chance of your plant is slim.

If your succulents are suffering from any of these problems, be careful to follow all the tips we have shared so that they become healthy and thriving in no time!

Learn How to Care for Bulbosa Air Plant

Learn How to Care for Bulbosa Air Plant

Tillandsia is slowly becoming a trend in houseplants, and its increasing popularity doesn’t look like it will die down anytime soon.

Tillandsia is also known as Air Plants, and they are called as such because they can thrive in the air, and they require no soil at all to grow.

These air plants come in a variety of shapes and sizes, depending on the species. One of the most notable among all Tillandsia species is probably the bulbosa variety, a species described by William Jackson Hooker in 1825. Tillandsia bulbosa, also known as Tillandsia bulbosa var. brasiliensis, Tillandsia bulbosa var. picta, Tillandsia erythraea, Tillandsia pumila, Platystachys erythraea, and Tillandsia bulbosa f. alba, has a unique, out-of-this-world look. They are capable of making a statement with their appearance, and they can create an exciting contrast to any plant arrangement.

The leaves of the Tillandsia bulbosa are narrow with curly edges, which gives them a tubular, straw-like shape. The leaves grow twisted and contorted, which makes the plant look like tentacles. As the plant matures, the blush displays a hint of deep purple and red before it produces flowers. The hollow, bulbous base of the plant often become homes for ant colonies, so don’t be shocked to find ants in your Tillandsia bulbosa when you plant them outside. Your plant also benefits from these ants through their detritus or waste, which serves as fertilizers to your plant.

Caring for Tillandsia bulbosa

To better understand how Tillandsia bulbosa thrives, it is crucial to know how they grow in their natural habitat. Tillandsia bulbosa is common in Central and South America. They grow abundantly in the warm and humid countries of Colombia, Southern Mexico, Venezuela, and the West Indies. In the wild, this air plant is commonly found at sea level to an altitude of 1400 meters.

The Tillandsia bulbosa are small Bromeliad epiphytes, which means they use their roots to attach to a substrate rather than on the ground. Because of that, you will most likely find dense masses of Tillandsia bulbosa growing in branches in open woods or low-lying forests, in mangrove thickets along coasts, and on lianas located on river shores.

Light

Light

Tillandsia bulbosa will thrive where it gets plenty of light, but it will not tolerate direct sunlight. Put it where it can receive filtered or indirect light. When growing your plant indoors, we recommend that you place it near a south-facing window. If your home doesn’t get the amount of light that your Tillandsia bulbosa needs to survive, you may also consider growing it under artificial light or a grow light. A grow light can provide the light that your air plant needs, especially during the dark, cold months.

Humidity

When deciding where to put your Tillandsia bulbosa, keep in mind that their natural habitat is relatively humid. That said, it will not tolerate a very dry environment. Consider putting it in your kitchen or bathroom where there is still adequate air circulation to prevent the growth of molds and fungus.

Temperature

When deciding where to put your Tillandsia bulbosa, keep in mind that their natural habitat is relatively humid. That said, it will not tolerate a very dry environment. Consider putting it in your kitchen or bathroom where there is still adequate air circulation to prevent the growth of molds and fungus.

Containers

You will often see a Tillandsia bulbosa sold in terrariums or pretty tall vases, but these are not the ideal environment for your plants. All air plants require plenty of fresh air and will thrive when left in the open, so avoid putting it in a container that won’t allow proper air circulation. If you want to put your Tillandsia bulbosa in a container that holds water, make sure to drain out the excess after you water your plant. Never plant it together with moss because moss holds water and will cause your plant to rot.

You can grow your Tillandsia bulbosa anywhere, including rocks, seashells, ceramic, clay pots, or driftwoods. You can also choose from various air plant containers sold online.

Containers

Water

If it’s your first time to grown an air plant, you might be wondering how to water a plant that doesn’t grow in soil. Watering your Tillandsia bulbosa is relatively easy, and also an essential part of caring for your plant.

The water you use in watering your Tillandsia bulbosa is essential. Never use distilled water because it will be harmful to your air plant. Softened water is also not advisable because of the salt it contains. Your best choices are filtered water, bottled water, or tap water that has sat long enough for the chlorine to dissolve. You may also use water from a pond or aquarium as long as they were not overcrowded with fish or other reptiles.

If you live in humid areas and you’re growing your Tillandsia bulbosa outdoors, you may never have to water your plant. Indoors where the air is drier and hotter, you will need to water your plant more.

Tillandsia bulbosa leaves don’t have many trichomes or hairs that attract water, so it will do well if you give it a little more water than the rest of your air plants. Mist your Tillandsia bulbosa a few times a week to make sure it remains happy and thriving. Increase the frequency of watering during its growing season or when it is getting plenty of bright light. You can also soak it occasionally, but make sure that there is no excess water left on its bulbous base after soaking to avoid rotting.

Fertilizer

Despite having no soil, there are still several ways to fertilize your Tillandsia bulbosa. You can spray it every two weeks with a specialized Tillandsia fertilizer mist like this one to give it extra nutrients. If you have a pond or an aquarium at home, you can also use the water as a natural fertilizer for your air plant. Fish water contains nitrates and other nutrients that make for perfect plant food.

Toxicity

Tillandsias are not toxic to cats and dogs. But like any other plant, it can cause an upset stomach if consumed in large amounts. Luckily, hanging or mounted Tillandsia bulbosa is safe from the curious paws of your furry pets, so consider growing them that way.
Toxicity

There are two different species of bulbosa. The first one is the Tillandsia bulbosa guatemala, which is smaller and has darker green shade compared to the second species, the Tillandsia bulbosa belize. Both species are mesic, which means they have smoother and greener leaves with fewer trichomes and require indirect light and more water than the xeric Tillandsia varieties.

The Tillandsia bulbosa is a common air plant that you can easily find in most garden stores. If your local garden store does not carry air plants, you can find some here.

For a stress-free experience of growing Tillandsia bulbosa, we suggest that you check the product links we recommended above. These products will help you care for your air plants properly to help them stay happy and healthy. If you have any questions regarding Tillandsia bulbosa care, please don’t hesitate to ask through the comment box below.

Giixer 1000W LED Grow Light, Dual Switch & Dual Chips Full Spectrum LED

Giixer 1000W LED Grow Light, Dual Switch & Dual Chips Full Spectrum LED

New Upgrades: Compare with the traditional 1000 watt grow lamps, this new Dual-Chips 10w led lights is bigger, brighter and efficient, but consuming only 110 watts.
Shappy 6 Pieces Air Plant Stand Airplant Container Tillandsia Holder Stainless Steel Plant

Shappy 6 Pieces Air Plant Stand Airplant Container Tillandsia Holder Stainless Steel Plant

Durable and quality: made of stainless steel of good quality, not easy to change its shape, erosion and rust resistant, you can use them for a long time
Air Plant Fertilizing Mist

Air Plant Fertilizing Mist

SUPERCHARGE your Air plant and Epiphyte collection with a liquid plant fertilizer specially concentrated for convenient weekly applications. Refill your fine misting spray bottle with water, follow the directions to add concentrated solution and shake! Fertilizing formula featuring 16-9-25 NPK and is gentle enough to spray directly on the plants with no mixing and measuring required! Air plants need more care then just air and a weekly spray provides the food they need.
Airplants Tillandsia Bulbosa

Airplants Tillandsia Bulbosa

  • These are excellent plants for terrariums.
  • They are hardy, and only require a weekly misting.
  • They have a very unique look.
Propagating Succulents During the Autumn Season

Propagating Succulents During the Autumn Season

The beginning of autumn is the best time to propagate succulents, especially the summer dormant types like aloe vera and kalanchoe. In autumn, these types of succulents have just produced new growth, and flower buds may have started to emerge, too. If you have these types of succulents spilling over their containers, then autumn is the perfect time for you to snip a few cuttings to propagate. You’ll help the mother plant produce new growth, too.
Propagating Succulents During the Autumn Season
Here are more reasons for you to propagate your succulents during early autumn:
  • Succulents that are dormant in summer awaken and start growing again
  • The mild, warm weather promotes growth
  • The ideal time to propagate is when the plant is growing
  • To refresh succulents that have grown exceedingly lush and unkempt in the course of the long, hot summer
  • You will give your succulents enough time to grow before winter, which will prepare them to be healthy and thriving for the spring season

Succulent Dormancy

Succulents fall into two categories when it comes to dormancy. Those that become dormant in summer stop growing from mid to late summer and start growing in winter. During dormancy, they prefer little water, indirect light, and absolutely no fertilizers. As autumn sets in and the weather become cooler, summer dormant plants will continue growing, and flowers will start to emerge.

Winter-dormant succulents, on the other hand, thrive mainly in spring and autumn and sleep in winter. However, most succulents take every opportunity to grow. This means they will continue to grow in whatever season as long as their environment allows them to.

For example, a summer dormant plant might still put on some new growth in mild summer weather but will go completely dormant when the temperature rises. Crassula succulents are summer dormant plants but also put on new growth in summer when the conditions allow them.

Propagating in Autumn

You can quickly grow your winter dormant succulents during early autumn, so we recommend that you prioritize propagating your summer dormant succulents during this season. Here are some of the most common summer dormant succulents that usually grow in autumn to early spring:

Aeoniums

Aeoniums originate from the Canary Islands. They have striking rosettes, and their leaves grow out of a single stem. Their stems can be long or short, and their offshoots emerge from a single flowerhead. Aeoniums come in a variety of colors, shapes, and sizes. They are monocarpic, which means they die after producing flowers.

Aeoniums can withstand cold and go dormant in scorching and dry weather. When they go dormant, Aeoniums curl and drop their leaves to avoid water loss.

Aeoniums

Kalanchoe

Kalanchoes are native to Africa and are prevalent in North American households. It thrives in low-light conditions. Typically, kalanchoes need 14 hours of lightless condition to bud and bloom. It blooms in late winter to late spring, and grow dormant as lighting increases.

Dudleya

This succulent is native to North America, where the weather is generally warm. Its color ranges from green to gray and looks similar to echeveria. Some Dudleya lives for twenty to over one hundred years. They come in varying colors, sizes, and leaf shapes.

It is essential to refrain from watering them during the summer when they grow dormant. Dudleyas reawaken from drought-induced dormancy when fall or the winter rain sets in. Their leaves immediately plump up, their growth resumes, and the flower comes in spring.

The list of summer-dormant succulents also includes Aloe, Crassula, Gasteria, Peperomia, Haworthia, Sedeveria, Sedum, and Senecio. The crisp weather of autumn signals these succulents to wake up and exit summer dormancy, and prepare for the coming spring season.

Propagation

You can propagate summer dormant succulents in autumn through offshoots, leaf cuttings, or stem cuttings. Here is a guide on propagating your succulents during autumn season:

  • Get a healthy cutting or offshoot from the parent plant.
  • Place the cutting or offshoot away from direct sunlight, where it will dry for a couple of days.
  • After five to ten days, insert the cutting or offshoot in a pot of fresh soil mix.
  • Put the pot in an area where it gets filtered light. Shield it from direct sunlight to avoid dehydrating the leaves.
  • Water the soil without splashing on the stem or leaves of the plant.
  • After two weeks, check for rooting by gently tugging on the plant. If the cutting or offshoot doesn’t move, it means it has formed roots.
  • As your plant matures, it will become more drought-tolerant so that you can water it less frequently.
Do you grow other winter-growing plants that were not included on our list? Do you have any other tips for caring for these plants during the autumn season? We’d love to hear about it!
How to Grow and Propagate Echeveria Lola

How to Grow and Propagate Echeveria Lola

The Echeveria Lola is no doubt one of the most beautiful plants in the succulent world, so there’s no wonder that it’s a favorite among succulent growers! It has pale gray-blue leaves with a faint hint of pinkish violet. The leaves have intricately designed edges that resemble a curly bracket. The thick farina, or wax coating, gives its leaves a pearlescent marbled texture, which makes it stand out in any garden.

The Echeveria Lola is a hardy succulent common among households because it’s relatively easy to care for. It can happily grow in containers and landscapes.

In this article, we’ll tell you how to care and propagate this stunning succulent.

Echeveria Lola

The Echeveria lola is the gorgeous outcome of the cross between the Echeveria lilacina and Echeveria derenbergii. However, other succulent experts say that either the Echeveria deresina or E.’ Tippy’ is a parent instead of E. derenbergii. Dick Wright created the Echeveria lola hybrid in 1980.

While it is considered a hardy succulent, the Echeveria lola is still susceptible to frost damage. If you’re in the USDA Hardiness Zone 9 or below, it’s best to plant the Echeveria lola in containers so you can bring them indoors when the temperature starts to drop. For those living in Zones 9-11, the Echeveria lola is perfect for outdoor growing.

In the spring and summer, the Echeveria lola produces bell-shaped peach, yellow, or coral pink blooms. These flowers sit on top of tall and spindly bloom stalks that can grow to almost 6.0″, which helps in attracting pollinators. The plant also produces offsets, which are sometimes called pups. The growing season for Echeveria lola is during the summer when it grows at a moderate rate.

A native to Mexico, the Echeveria lola is also often referred to as Mexican Hens and Chicks. However, this name is used to refer to several Echeveria variants.

How to Care for Echeveria Lola

Caring for Echeveria lola is similar to caring for most succulents. It’s a highly-resilient plant that’s perfect for forgetful gardeners or those who want to start their succulent collection.

Light

Generally, the Echeveria lola needs full sun to partial shade to thrive. Remember to keep it away from direct afternoon sun to avoid sunburn on the leaves. We recommend that you put your Echeveria lola in an outdoor location where it gets bright sunlight in the morning and decreased light exposure in the afternoon.

When growing Echeveria lola indoors, place it beside a south-facing window where it will get the most sun. It can also thrive under grow lights. The right grow light can provide the light that your plant needs to grow.

Light and Temperature

While cooler temperatures will enhance the rosy coloring of your succulent, it does not hold up well to cold temperatures. An Echeveria lola will not be able to survive in climates with temperatures below 20° F.

If it’s not possible to bring your succulent indoors when the temperature starts to drop or when there is a forecast of rain, snow, or frost, we recommend that you use a portable greenhouse to help your plant survive the cold months. This portable walk-in greenhouse is easy to assemble and perfect for use both indoors and outdoors. It has enough space and eight durable shelves to shelter your succulent collection during the winter.

When it’s time to take your Echeveria lola outdoors, remember to acclimate it first to the full sun. Just like human eyes, succulents also need to adjust to changes in light exposure to avoid damage. Give your plant plenty of time to adapt to the difference in the amount of light it receives by slowly increasing its light exposure. Do not immediately leave it under the full sun for extended hours after it has stayed indoors or in the shade for a long time. Succulents are vulnerable to sunburn, especially the young ones.

Also, keep in mind that an acclimated succulent is still susceptible to sun damage, especially during summer, when the heat is intense. To protect your Echeveria lola from sunburn, we recommend that you use shade cloth. This shade cloth can protect your plant or greenhouse from harsh sunlight while still allowing air to circulate. Water can also go through the mesh, so you don’t need to remove it when watering your succulent.

Water and Humidity

Just like most succulents, your Echeveria lola loves the old “soak and dry” method of watering. Drench the soil with water until the water comes out from the drainage holes, then wait for the soil to dry up before you water it again. This watering method ensures that your plant gets the same amount of water it receives when it is in its natural habitat.

Make sure not to get water on the rosettes of your Echeveria lola to avoid problems caused by unneeded moisture. Likewise, avoid putting your plant in humid areas, like a closed terrarium, to prevent leaf rot. A terra-cotta pot is the best container choice for growing succulents. These pots have a surface that allows water to evaporate, and clay bottoms and drain holes that allow good drainage and proper ventilation. Having a suitable container for your succulent will minimize the effects of overwatering and prevent root rot.

Keep a close watch on your Echeveria lola for signs of overwatering, which is the most common cause of death among succulents. If the leaves are turning yellow, mushy, and falls off quickly, it means it’s getting more water than it needs. On the other hand, the leaves of an underwatered succulent will dry up, wilt, and turn brown.

Soil

Water and Humidity

A well-draining soil is essential for all succulents. For your Echeveria lola, choose a soil that drains quickly, so your plant doesn’t sit on water for too long. The soil should be one part perlite and one part potting soil. If you’re not very confident about making your own, you can get your succulent soil mix here.

Fertilizer

The Echeveria lola doesn’t require regular feeding as it grows. However, when your plant appears bleak or has hit a growth plateau, you can give some fertilizer to make sure it gets the nutrients it needs to thrive. You can try these fertilizer capsules to stimulate the root growth and stem development of your Echeveria lola.

Repotting

Repot your Echeveria lola every other year, so it gets fresh soil. When repotting, check for root rot and other root damage so you can address them accordingly. Make sure that it has healed from any wounds or damage caused by the repotting process before you water it. Use a pot with adequate drainage holes to avoid root decay.

Pruning

The old leaves of Echeveria lola will naturally fall off, but if you are bothered by the dead leaves on the lower stem that are still clinging to the stem, you can gently remove them using your hands. Remove any fallen leaves sitting on the pot because they can invite pests and other diseases once they start to decay.

How to Propagate Echeveria Lola

It’s relatively easy and fun to propagate the Echeveria lola. You can reproduce it by leaves, stem cuttings, and offsets.

Leaf

Propagating Echeveria lola by leaf-cutting takes time, but it usually results in successful growth. To propagate, gently take a leaf from the stem. Let the leaf heal for a few days before putting it on top of well-draining soil. Mist the leaf with water for several days until you see root settling into the soil.

Stem Cutting

Use a sharp knife cut a piece of the plant. Remember to cut just above a leaf on the stem. Wait for a few days before placing it in well-draining soil.

Offsets

The Echeveria can propagate on its own by producing offsets. Remove the offsets from the mother plant using a sterile knife or pair of scissors. Let the offsets dry of about two days before planting them on a well-draining soil.
Offsets
Growing this succulent favorite is simple! If you are planning to grow one, you can order your Echeveria lola here. Please avoid purchasing succulents from individuals without proven credentials to ensure that you get a healthy and pest-free plant.

If you want to know more about growing or caring for other succulents, please feel free to browse through our website. We at Eden Succulents aim to teach our readers everything we know about succulents, and we are open to your comments, too. So, if you have information related to succulents, please feel free to leave us a comment in the box below. Happy planting!

Giixer 1000W LED Grow Light, Dual Switch & Dual Chips Full Spectrum LED

Giixer 1000W LED Grow Light, Dual Switch & Dual Chips Full Spectrum LED

New Upgrades: Compare with the traditional 1000 watt grow lamps, this new Dual-Chips 10w led lights is bigger, brighter and efficient, but consuming only 110 watts.
Home-Complete Walk-In Greenhouse- Indoor Outdoor with 8 Sturdy Shelves

Home-Complete Walk-In Greenhouse- Indoor Outdoor with 8 Sturdy Shelves

8 DURABLE SHELVES- The 8 sturdy shelves provide plenty of room for trays, pots, or planters of anything you want to grow. It’s a convenient option for any gardener!
YGS Perfect Sunblock Shade Cloth With Grommets

YGS Perfect Sunblock Shade Cloth With Grommets

Size: 20′ x 10′(6.1meters x 3.05meters) YGS shade cloth are made of PREMIUM QUALITY HIGH-DENSITY 100% UV stabilized polyethylene. Lightweight and durability,mesh and breathable, anti-aging
EarthPods Premium Cactus & Succulent Plant Food

EarthPods Premium Cactus & Succulent Plant Food

  • These are excellent plants for terrariums.
  • They are hardy, and only require a weekly misting.
  • They have a very unique look.