skip to content
Eden Succulents
Tips and Tricks for Growing Blue Cacti

Tips and Tricks for Growing Blue Cacti

Have you heard about blue cacti? Yes, the ones that have been all over social media! If you want blue cacti to be a part of your garden or succulent collection, this article is for you!

Succulents have taken over the world, in fact, a lot of gardeners have joined the bandwagon and started growing succulents in their gardens, whether indoors or outdoors. Do you know that all cacti are succulents but not all succulents are cacti? You heard it right! If you are planning to grow cacti at home, in this article, we will be discussing the tips and tricks for growing blue cacti. If you are curious and you want to find out more, make sure to continue reading below!

If you are planning to grow or care for a blue cactus, Pilosocereus is the best choice for you! This variety of cacti is widely cultivated by succulent growers; there is a big chance that you will be able to find one in a garden center near you! Most cacti love full sun exposure and do not do well in cold climates.

A lot of cacti varieties have been grown for ornamental features, including the spines, shape and size, and their beautiful flowers. Some cacti are grown because of the color of the skin. Most cacti species are green, but there are blue cacti that are beautiful that can make any landscape, xeriscapes, or desert gardens stand out. Cacti come in different sizes, shapes, forms, and colors and because of that, they can be used in various garden settings and dish gardens as well.

Here are the different varieties of blue cacti
Here are the different varieties of blue cacti:

1. Pachycereus pringlei – It is also known as Elephant Cactus. This plant’s ribs are blue-green. It is native to Northwestern Mexico and can be found in California.

2. Cholla cactus – This cactus is a fuzzy blue. It is commonly grown in the south and southwestern parts of the United States. They are known for their barbed spines so watch out! They can attach deeply on the skin, clothing, and fur!

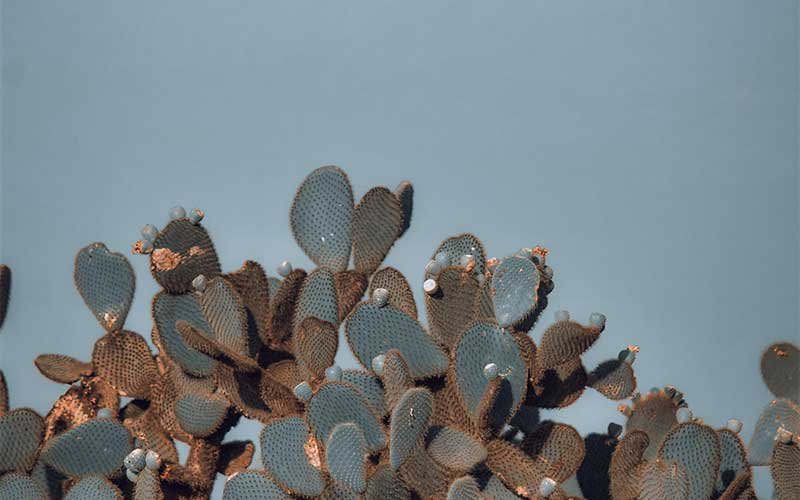
3. Opuntia – It is also known as Prickly Pear. Some varieties of Opuntia cactus have blue skin and sometimes purple-blue. This genus has more than hundreds of species found all over America. Some species are green, but a few of them have a striking blue color which is frost hardy, so no worries of them dying out during the wintertime. Opuntia cactus, like any cacti variety, needs full sun to thrive, as they can be prone to rot.

A. Opuntia gosseliniana is a beautiful cactus that can be added to any desert landscape; it has deep turquoise pads and shades of pink and purple. This plant and the Opuntia santa-rita is the bluest among all the cacti varieties.

If you are planning to plant this cactus in your garden, you must know that it is a fast-growing species. This plant has small spines that can attach itself to your skin and can be quite hard to find and remove, so you must place it in an area where no one can accidentally brush up on it.

Opuntia gosseliniana

4. Cereus Column cactus – This cactus grows upright and has a blue-colored skin. This cactus belongs to a large genus. Some are blue and the others have bluish skin.

A. Cereus hankeanus – It is a cactus species commonly found in Brazil. It is a thin columnar cactus that grows fast. If you will grow this plant in your garden, make sure you are ready to cut it multiple times in a year.

B. Cereus hildmannianus (Uruguayensis) – This cactus is commonly found in Brazil, it is also known as Cereus pervuianus or Queen of the Night. It is one of the most commonly grown columnar cacti in the southwestern parts of the US. This cactus grows quite fast. You can grow small versions of it as they tend to keep the blue coloration than the larger ones.

C. Cereus aethiops – This cactus is a native plant commonly found in Brazil, it has black spines and a blue-green columnar body. Warning: This succulent is difficult to handle, its spines are long, thin, and sharp and can penetrate cactus gloves. Be careful when handling them! Although this plant can be added to any landscape, there is a possibility that it can grow out of control and can be difficult to remove. This plant can tolerate cold weather.

5. Browningia – This cactus belongs to a small genus from South America, The Browningia hertlingianus or also known as Azureocereus hertlingianus. It is one of the most tender cactus species out there. This cactus is a Peruvian species and has knobby columns and golden spines; its skin has powder-blue to blue-green color. This cactus can withstand cold weather; just make sure that it will have full sunlight exposure.

6. Micranthocereus estevesii – This cactus species is also known as Siccobaccatus insigniflorus. It has plenty of orange spines and it contrasts its lovely turquoise color which makes it a perfect ornamental plant. This plant is a tender species and can be affected by freezing temperatures during wintertime.

7. Ferocactus glaucescens is a blue-green cactus species and it has yellow-orange spines. It is from Mexico and does not grow very tall like the other blue cactus varieties. It is quite hardy for individuals who live in Southern California and can be considered as one of the most carefree cacti variety.

8. Melocactus – Some melocacti are green and are grown by gardeners because of their amazing cephalums. The cephalums are the flowering parts of the cactus that form a large reddish cone structure.

A. Melocactus azureus – It is also known as Turk’s Cap and Melocactus glaucescens or also known as Waxy-stemmed Turk’s Cap have blue-colored skin. They are hardy species and are considered to be the most commonly available species. This cactus species can withstand low temperatures in the upper 20 degrees Fahrenheit. They are slow-growing and will take a lot of years before they become mature.

Melocactus azureus has fine spines compared to the glaucescens. When the cephalum appears, the melocactus stops growing and further growth goes to the cephalum. The cephalum is usually white, while the others have red tops.

9. Pilosocereus – This plant is from Brazil, it is also known as Tree Cactus, and it has powder-blue skin. It is considered as one of the most popular blue cacti species available. It is commonly available and has an extreme blue color which makes it a popular choice among gardeners because of its amazing ornamental appearance.

Some of the varieties may seem fake because of their color. Pilosocereus is a cactus genus that is commonly found in South American countries such as Brazil, Mexico, and the Caribbean, it can also be found in Florida.

Pilosocereus azureus is a beautiful blue cactus native to Brazil. It has a dramatic color and can be used with green plants. The blue cactus becomes bluer when the cactus matures.

Pilosocereus is one of the most tender species of cacti. They can be easily damaged during wintertime. If they can survive the cold weather, they will not be able to avoid getting damage caused by extremely cold temperatures and they are prone to forming ugly scars caused by freeze damage. When you have this variety of cacti, make sure to use newspaper and Styrofoam cups on the top of the cacti when the cold weather comes so you can protect them from freeze damage.

Pilosocereus azureus

How to Care for Blue Cactus?

Most of the blue cacti varieties come from Brazil. They prefer full sun exposure and are not frost hardy. When planting a blue cactus plant you must use soil that is a bit gritty and well-draining. You don’t need to feed your blue cacti; they are easy to care for and need minimal watering.

Blue cacti can be a great addition to the garden. It can stand out in a garden full of green plants. Cacti varieties have varying shapes, sizes, forms, and blooms beautiful flowers. A cactus plant is one of the most flexible plants and is capable of surviving in harsh environments.

A blue cactus is thought to have evolved to protect itself from the environment and predators. The blue skin color of the cactus may have developed to help protect the plant from extreme sun exposure or to prevent certain pests from attacking the plant. Blue plants are not commonly found in nature, so if you want blue tones in your garden, the blue cacti are the perfect solution.

General Information About Cactus Plants

If you are searching for a plant that can thrive in harsh, drought-tolerant conditions, the cactus is a perfect choice. Most cacti varieties come from areas with dry climates, they are used to surviving for long periods without rainfall.

Most gardeners prefer blue cacti because they can be used as an ornamental plant. Just make sure to provide a bright, sunny area, and you can enjoy having this amazing and easy to care for houseplants, this makes it a perfect plant for forgetful gardeners.

There plenty of varieties of cacti that you can grow. Because of their different shapes, colors, sizes, you are bound to find one that suits your personality and design style. Make sure to provide enough light so they can bloom, the flowers have different colors, white, pink, orange, red, yellow, or purple. The most common ones are the Cereus, Opuntia, Pilosocereus, Ferocactus, etc.

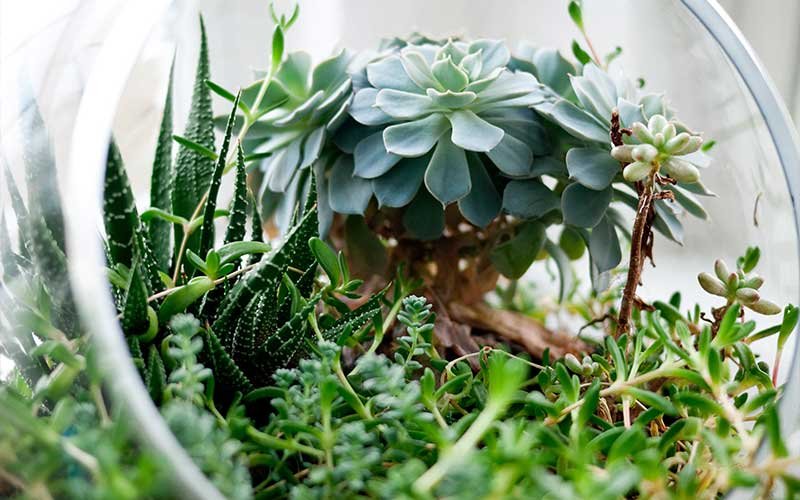
If you decide to care for your cactus indoors, you can place them in well-draining containers like this. You can also use grow lights. You can grow different cacti together on a tabletop or a windowsill. You can add them when creating a small indoor succulent garden. Cacti make good houseplants; just make sure to keep them in areas where pets or small children can accidentally brush up on them. Some cacti can also be used as plants in offices.

Cacti make good houseplants

How to Grow Cactus Plants

  • Cactus houseplants can grow their best when placed in a warm bright area. They need lots of direct sunlight.
  • When watering your blue cacti, you can water them every two or three weeks. Do not overwater them because they are prone to rot if they stay in moist soil.
  • Most cactus plants are slow growers and will not need fertilizer. If you prefer to feed them with fertilizer, you can just apply a couple of times per year. You can do it during the spring and summer months, when using a fertilizer you must follow the directions on the packaging. You can use a 20-20-20 water-soluble fertilizer. Get it here.
  • Since most cacti are slow growers, there is no need to worry about pruning, only some varieties tend to grow fast and if they do, you have to prune them accordingly. Just be careful when handling the varieties with spines.
How to Grow Cactus Plants
  • You can grow cacti in containers outdoors, if you have a deck, patio, or balcony, as they prefer full sun, they can survive even with areas that have extremely high temperatures and they will need containers that have drainage holes. Get your containers here.
  • If you live in areas that have freezing winters, you have to take your cacti indoors during wintertime. The cold can kill your cacti or if not, can leave a nasty scar from frost damage that will not go away. If you love your cactus plant, do all the necessary measures to save them from the freezing temperatures, especially if they are not the frost-hardy kind.
  • If you live in areas that are preferable for growing cacti, you can plant them in a well-draining spot, like areas on top of a sunny slope or a rock garden. Avoid planting cacti where they will be exposed to moist soil. A cactus is prone to rotting if exposed to too much moisture.
  • You can propagate your cacti; you can do it by using cuttings from a mature cactus plant. You can cut the top part and plant it and it will get roots. By cutting the top part of your cactus plant, you can ensure that your plant will be producing flowers.
If you are a big fan of the blue color and live in an area preferable for cacti to grow, you can add blue cacti in your garden. They can be an excellent addition to any landscape, garden, or as a part of your succulent collection. If you live in areas that get cold (below freezing) just make sure to take the needed measures that will help protect and preserve your plants. Freeze damage does not completely go away as it will leave an ugly scar on your beautiful plant.

One of the most popular blue cacti varieties is the Pilosocereus and what makes it lovely is that they have orange spines that give a contrasting effect. They are beautiful and attractive and will be a great addition to any garden.

Pilosocereus
If you are a big fan of the blue color and live in an area preferable for cacti to grow, you can add blue cacti in your garden. They can be an excellent addition to any landscape, garden, or as a part of your succulent collection. If you live in areas that get cold (below freezing) just make sure to take the needed measures that will help protect and preserve your plants. Freeze damage does not completely go away as it will leave an ugly scar on your beautiful plant.

One of the most popular blue cacti varieties is the Pilosocereus and what makes it lovely is that they have orange spines that give a contrasting effect. They are beautiful and attractive and will be a great addition to any garden.

Cuttings Purple Prickly Pear Cactus Opuntia Violacea

Cuttings Purple Prickly Pear Cactus Opuntia Violacea

  • Healthy, Living cactus pads (unrooted)
  • Pads measure 6″-8″
  • Freshly cut from healthy cactus
Pilosocereus pachycladus Specimen Cactus

Pilosocereus pachycladus Specimen Cactus

  • Pilosocereus pachycladus Specimen Cactus Cacti Succulent Real Live Plant
  • The plant is shown in a 6 ” pot
J R Peters Jacks Classic 20-20-20 All Purpose Fertilizer

J R Peters Jacks Classic 20-20-20 All Purpose Fertilizer

  • Free Measuring Spoon Enclosed For Easy And Precise Application
  • Features The Highest Safety Factor To Prevent Burning When Applied As Directed
Cereus hildmannianus

Cereus hildmannianus

Cereus hildmannianus @ QUEEN OF THE NIGHT seed 30 SEEDS
Best Agave Plants to Grow In Your Garden

Best Agave Plants to Grow In Your Garden

A lot of succulent growers prefer growing agave plants in their gardens because they are easy to grow and care for. Since there are a lot of agave varieties available, you can choose which one works best for you. You can grow them as a specimen or combine them with other succulent varieties to create a stunning garden or landscape.

If you want to find out more information about agave, make sure to check out the list below for the best agave plants to grow in your garden. We will also provide some tips that can help you be successful in growing agave plants whether indoors or outdoors.

Agave varieties prefer full sun exposure and they do best in sandy, well-draining soil. Agave is the perfect plant for forgetful gardeners that tend to forget to water their plants from time to time since they can live even with a small amount of water. Some varieties are cold-tolerant while others cannot tolerate cold climates. Agave plants bloom flowers although it is a rare occurrence, they produce a large flower spike that resembles asparagus.

Best Agave Plants to Grow In Your Garden
Agave plants are the best solution for gardeners that are planning to save water while at the same time maintaining the dramatic effect and structure that an agave succulent can provide. They also provide simple but breathtaking color and texture. Agave succulents prefer growing in the Southwestern and Mediterranean climates. They can also be grown outside of these zones if planted in pots or containers and protected from harsh weather conditions.

Here is a list of the best agave plants to grow in the garden:

1. Agave attenuata – This succulent is a spineless variety of agave, which makes it a safe option. It is also known as the Foxtail or Dragon-Tree Agave. It can grow up to 4-5 feet tall. Its flowers are greenish-yellow on the spike. This plant can be used as a houseplant as it does not have spines which can be quite dangerous, unlike the other varieties mentioned on this list. You can plant the Foxtail Agave in a small yard or as a poolside plant where it is not at risk of being brushed up on accidentally by pets, guests, or family members alike.

2. Agave americana – This plant is commonly known as the American Century Plant. Its leaves are bluish and have saw-tooth spines. You can use this plant as a specimen plant in the garden as it can grow quite large with the appropriate growing conditions. Agave Americana Marginata is a known variegated variety of Agave americana.

Agave americana

3. Agave filifera – This plant is also known as the Thread Agave. Its leaves have white edges and have thread-like filaments, hence the name, Thread Agave. This plant has dark green leaves with a slight bronze shade. If you prefer a medium-sized plant, you can choose the Thread Agave; it can grow up to 2 feet tall and 3 feet wide.

4. Agave victoria-reginae – It is also known as Queen Victoria Agave. It is a smaller plant, making it perfect for pots or containers as it only grows about a foot up to 18 inches in height. Its leaves have black tips and it is curved inward which creates a compact dome. This plant can live up to 20 to 30 years and can produce lovely cream or reddish-purple flowers on a fifteen-foot stalk.

5. Agave parviflora – It is also known as the Small Flower Agave, Small Flower Century Plant, or Santa Cruz Striped agave. This plant is a small variety of agave; it can grow up to 6-8 inches tall. It is also similar to the Agave filifera because its leaves have white graphic markings with beautiful hair filaments. This plant produces a flower stalk after 6-8 years that can reach up to 3-7 feet high and blooms cream or yellow flowers that are quite attractive to bees, butterflies, and other pollinators.

Agave parviflora

6. Agave bracteosa – It is also known as Squid Agave or Candalebrum Agave. It is a drought-tolerant, slow-growing agave plant. It can be used as a potted specimen and be added to your rock garden.

7. Agave vilmoriniana – It is also known as Octopus Agave. It has untoothed arching and twisting leaves. Its rosettes can grow up to 3-4 feet tall and 5-6 feet in width. This plant is considered as one of the friendlier Agave varieties because it has soft serrations on the margins of the leaf and it has a soft terminal spine.

8. Agave tequilana azul – It is also known as Weber’s Blue Agave, Tequila Agave, or Blue Agave. It is commonly used to make tequila in Jalisco, Mexico. It is a beautiful garden plant and it can grow up to 6 feet tall and blooms in 6 to 8 years with a 15 feet spike with yellow flowers.

This plant can be used in landscapes for areas found in high altitudes. The Blue Agave prefers rich, well-draining sandy soil. It can grow quite huge and can live up to several decades, so you must grow it if you are ready for a long-term commitment.

9. Agave parryi – It is also known as the Artichoke Agave. It is a lovely plant and it has sharp black spears tip on the end of its wide bluish gray-green leaves. It can grow even in rocky and dry slopes. This plant loves full sunlight and can be planted in pots or containers.

10. Agave desmettiana – It is also known as the Smooth Agave. If you prefer people and pet-friendly agave, this one is perfect for you. It can be used as a focal plant in xeriscapes or desert gardens.
You can also plant the Smooth Agave near patios, whether as a single specimen plant or placed in groups. This succulent produces its pups from basal offshoots, making it easy to propagate; you can easily repot the pups in new containers.

11. Agave lophantha – It is also known as a Quadricolor Agave. This plant has dark green leaves with yellow stripes, pale green midstripe with reddish edges lining the teeth. It grows slowly and takes a long time to grow in their containers.

12. Agave macroacantha – It is also known as the Large-thorned Agave or Black-Spined Agave. This plant has medium-sized rosettes and blue-gray narrow leaves. It has sharp 1-inch black terminal spines on the tips. It produces offsets and blooms tiny purplish-green flowers and prefers full sun exposure.

13. Agave geminiflora – It is also known as Twin Flower Agave and Agave Palito. This plant has hundreds of leaves that form a well-rounded compact rosette that grows up to 3 feet tall. It takes up to 10 to 15 years for the plants to mature. It produces a beautiful flower spike that grows up to 8 to
12 feet tall. Its flowers grow in pairs hence the name Twin Flower Agave. This variety of agave is monocarpic, it dies after it blooms flowers. Plants grown indoors do not bloom flowers.

14. Agave potatorum – It is also known as Butterfly Agave. This succulent’s leaves resemble a butterflies’ wings. It is a medium-sized agave that grows slowly so you can plant it in pots or containers. If grown in a container, the butterfly agave is easy to control.

Agave potatorum

15. Agave angustifolia – It is also known as Caribbean Agave. This plant has narrow leaves and forms a rosette; it is a variegated Century Plant and grows up to 4 feet tall and wide. It has pale green leaves with cream-colored margins.

It is stiff and has dangerous, sharp spines on the tips. Be careful when growing this succulent as it is quite painful when the spines prick your skin. Its flower stalk produces small plantlets that can be replanted. It is quite fragrant and tends to attract butterflies, bees, and other pollinators.

16. Agave bovicornuta – It is also known as Cowhorn Agave. This plant has glossy leaves that widens and resembles a spatula with spiny red tips. The Cowhorn Agave grows up to 3 feet in height and 4 feet in width.

17. Agave salmiana – It is also known as Ferocious Agave. It has well-armed spines on the edges of its leaves and a stout stinger on the tips. It grows up to 4 feet in height and 3 feet in width. It can withstand cool weather but must remain dry during the wintertime.

Information about Agave Plants

Leaves – Agave plants do not have stems; they have strappy leaves that usually have sharp spines on their tips. Foliage tends to be blue-green in hardy varieties, and gray-green in warm climate varieties. Some varieties are variegated and have gold, white, or cream markings.

Information about Agave Plants

Flowers – When the agave plants become mature, they produce a tall, flower-stalk that grows from the center of the plant. The flowers are like bells and last long, usually in shades of yellow, green, or white. Agave plants are monocarpic when they bloom flowers, they die. No need to worry though, as it produces plenty of offsets or pups that can take the place of the parent plant.

Which Areas Do Agave Succulents Grow Well?

Some agave plants are not frost-hardy, but the Agave parryi can be planted as a perennial plant in areas that belong to the USDA Zone 5. The majority of the agave plants are hardy in USDA Zones 8-9 and up.

Sunlight exposure – Agave plants need an area with full sun to partial shade, if you live in an area with hotter climates, the agave plant will be able to handle more shade.

Soil – Agave succulents need well-draining soil, but they grow best in rocky or sandy soil.

Water – Mature agave plants are very drought-tolerant, during the first month you must water your plant every 4 or 5 days while the plant is still not established. Then you can do it once a week, then gradually spacing the watering of the plant to every other week, depending on the weather conditions in your area.

Feeding or Fertilizer – Do not feed your agave plants, they can take care of themselves. Feeding can cause early flowering, if this occurs, the agave plants die off because most of them are monocarpic. When the parent plant dies, the offsets or pups can take the place of the parent plant.

Information about Agave Plants

How to Grow Agave Plants From Seeds

You can grow agave succulents from seeds, follow the instructions below so you can be successful in growing agave plants from seeds.

Prepare the items that you will need:

1. If you will use old planting containers, make sure to wash them well and let them dry under the sun for at least a day or two. The containers must be well-draining, if there are no holes, you can add them on the bottom part of the container before you plant your agave seeds.

2. Use a commercially prepared sterilized seed starting mix or you can prepare one using a mixture of sharp sand, pumice or perlite and vermiculite, coco coir or sphagnum moss. Sterilize the mix and bake it at 350 degrees Fahrenheit for 30 minutes.

3. Fill the clean planting containers with the sterilized seed starting mix.

4. Scatter the seeds on the surface of the mix, you can leave them exposed or you can sprinkle some mix over them to anchor them in place. Do not cover the seeds deeply as the agave seeds need sunlight to germinate.

5. Fill the drip trays with warm, distilled, or sterilized water and set the planting container in the water. When the top part of the soil is moist, remove the containers from the drip tray and allow them to drain.

To sterilize water, allow the water to sit for 24 hours, this allows the chemicals to dissipate. Bring the water to a full boil and boil it for 5 minutes. Let the water cool completely and pour it on a clean container from a height of 3 feet to aerate the water well.

6. After draining the excess water from the plant containers, cover them with plastic bags or plastic wrap. This allows sealing of the moisture inside and keeps it consistent during the germination process.

7. The agave seeds must be kept in a warm area (65-70 degrees Fahrenheit) and it must be exposed to bright, indirect sunlight. Germination may take a while, so you must be patient during this process. The young sprouts can be seen within 14-21 days of planting the seeds. After the seedlings appear, you must remove the plastic bag or plastic wrap.

8. Water the seedling sparingly, maybe at least 2x a week. You need to keep the soil slightly moist; too much water can kill your seedlings. You can use a spray bottle when watering your seedlings so you can prevent the displacement of the seeds and seedlings.

9. When the agave seedlings have 2-3 leaves, you can transfer them in their pots or containers. Just make sure to use pots that have drainage holes.

When the agave seedlings have 2-3 leaves

How to Propagate Agave Plants

Agave may take a long time to grow when planted using seeds, most of the time gardeners use agave pups or offsets. If you can buy agave pups from your local garden center or if you know a fellow succulent grower, you can ask for small pups that you can grow in containers or pots. Separate the pups from the parent plant using a sharp knife or trowel. Sometimes you can twist them off by hand by only using little exertion. Be careful when removing pups from spiny agave plants.

When removing pups from the parent plant, it is best that it has long roots but it is not necessary. If you can get a pup with no roots, you can still go and plant it and it will still grow just fine.

Agave plants generate pups on their stems or send them a few meters away. You can easily gather and repot them in a well-draining container. You must keep the young plants watered, but do not overdo it as too much water can cause root rot. Agave plants tolerate neglect; they can grow fast and spread fast even when left unattended in the garden.

Agave plants generate pups

How to Grow Agave Plants in Containers or Pots

Agaves just like the other succulents have shallow roots. They can be grown in different container sizes because they do not need too much soil. You must use a well-draining soil and the container must have drainage holes. You can use terracotta containers as they allow draining of excess water when you water your agaves. You can create your soil mix by mixing two to three parts potting mix with 1 part gravel.
Container grown agave plants can be repotted every couple of years using new soil. Agave plants can produce sucker roots; if the pot is overcrowded with roots you can cut the roots. You must allow the plant a week or so to readjust after cutting the roots, then you can water it again so it won’t overwhelm them.
Water your agave plants every week during summertime and once a month during wintertime. Make sure to water the plant when the soil is completely dry. If you live in areas that have extremely dry conditions, your agave plant may need more watering but no need to worry as agave succulents are very forgiving and they can thrive in extreme drought conditions.

Garden Design Tips for Agave

  • Agave plants can be used as a sculptural focal point or a focal plant in an outdoor garden. Just make sure to allow plenty of walking space around it so no one will get injuries caused by the spines of the plant.
  • Agave succulents can be used as a border grouping; you can plant several of the same plants or a combination of different varieties.
  • Agave plants are textural and structural and can be used as an ornamental plant. Agave succulents can bring a vivid contrast with other plants in your garden. You can pair them with ornamental grasses for a contrasting effect, soft grass versus the hard and spiny edges of agaves.
Gardeners who live in warm climates can grow agaves around pools or near patios. The leaves of the agave do not turn brown and drop rarely, they stay beautiful all year. If you prefer a spineless agave variety, choose the Foxtail Agave, as it is safe to use in heavily used or high traffic areas.
Gardeners who live in warm climates can grow agaves

How to Prune Agave Plants

Agave plants can be pruned and this can be done by removing dead leaves and removing any areas that have diseases. You can do some seasonal pruning before and after the growing season. After the winter months, you can remove any dead or damaged spears to allow some room for new growth.

You can keep your plants indoors as a houseplant during winter, use grow lights so it can grow well even when indoors. You can cut it down to size if there are spears that can be dangerous, and you must cut or remove them.

Agave plants can have sudden bursts of growth so you have to cut it back so you can control its excessive growth. Do not cut portions off the spears as the plant can look ugly with an exposed scar. Do not overdo the trimming of the plant; it can affect the ability of the plant to store water.

When pruning your agave plants use tools that are sharp and sturdy. Agave succulents have strong leaves and cutting them can be quite difficult to do. Protect yourself from spines and exposure to the agave sap.

  • Use proper protection
  • Use durable gloves
  • Wear pants and long sleeves
Protect yourself from spines and exposure to the agave sap

Pest and Diseases of Agave Plants

Agave plants encounter a few problems, one of them is the agave snout weevil, and it burrows into the plant’s center to lay its eggs which causes the plant to collapse. You will not be able to notice it so you can prevent this problem. If it occurs to one of your plants, you must remove it immediately and check for any remaining grubs.

Are you wondering which is the best agave plants that you can grow in your garden? You came to the right place. Eden Succulents is all about succulents. We love growing and caring for them and our passion for them inspires us to continuously learn about succulents and share all our knowledge with our fellow gardeners. If you are searching for guides and other information about succulents, make sure to check out our website. If you have any questions, suggestions, comments, or inquiries, please let us know. We will do our best to help you out!

Agave Filifera Schidigera

Agave Filifera Schidigera

  • PACKAGE OF 50 SEEDS.
  • Brand New and High Quality Seeds
Queen Victoria Agave

Queen Victoria Agave

You will receive plant similar to picture, currently growing in a 6 inch pot, shipped bare root (NO POT AND NO SOIL). All plants are packaged with care
Learning How to Grow and Care for Delosperma Succulents

Learning How to Grow and Care for Delosperma Succulents

If you are searching for succulents that are cold-hardy and can withstand drought-tolerant landscapes, Delosperma or Ice Plant is the perfect succulent for you. In this article, we will share everything we know about this succulent, hopefully, you will learn how to grow and care for delosperma succulents. If you have not heard about the Delosperma succulent we will share all the information we know about it so you can successfully grow and care for this beautiful plant. Read below if you want to find out more!
Learning How to Grow and Care for Delosperma Succulents

What is Delosperma?

Delosperma is a type of succulent also known as Ice Plant. Panayoti Kelaidis of Denver Botanic Garden has introduced this plant in the early 1990s to the gardening community. This plant is one of the most common succulents used in drought-tolerant landscapes. This plant blooms lovely foliage and its colorful flowers make a great addition to your garden.

Its low spreading stems make it a perfect choice for ground covers. You can plant your Ice Plant in areas with gravel mulch and they can decrease the reflected heat and glare during hot and sunny days. Delosperma succulents are perennial plants and most varieties can withstand dry and cold climates.

The Delosperma plant comes from South Africa. It has become popular with gardeners because of its amazing ornamental potential. If you have xeriscapes you can add this succulent for its bold colors throughout the seasons and even those individuals who live in zone 5 can enjoy having them in their gardens.

Delosperma comes in a variety of colors such as purple, pink, yellow, orange, magenta, bi-color, and many more color and shade combinations that you can choose from. You can check them out and pick which colors suits your garden and even your personality. If you want to attract different pollinators like butterflies and bees, especially honeybees, the Delosperma is an excellent source of honey.

Delosperma
The Delosperma succulent blooms flowers that resemble daisies. This succulent can grow about 3-6 inches in length and approximately 2-4 inches in width. The foliage is mostly evergreen that’s why they are commonly used as ground cover. The plant’s foliage can dieback during winter but do not worry because during spring new plants will grow from the seeds it produces.

The leaves of the plant are edible and can be used as an addition to salads; they can also be stir-fried or steamed just like the other vegetable dishes. It is deer-resistant so you don’t have to worry about your Delosperma plants be eaten by wild deer in your backyard or garden.

Which Areas Do Delosperma Succulents Grow Best?

Delosperma succulents are perennial plants in drier, less humid areas of the western part of the United States. If you live in cold wet zone 4 and 5 climates like Chicago, Cincinnati, and Madison you can grow and care for the delosperma succulents as an annual plant.

If you live in zones 6-8 like the Eastern Seaboard and areas near the Appalachian Mountains, the ice plants can live longer and you can plant them as perennial plants. You can also plant your Delosperma plants in containers or pots as they grow fast and can offer a burst of color and they look beautiful when the stems and lovely flowers cascade in the edges of their containers. You can bring them indoors during the winter season for individuals who live in areas that are north of zone 7.

When you are planning to grow delosperma succulents you must take note that the Delosperma succulents are less cold hardy in wetter climates. A wetter climate reduces their ability to tolerate the cold weather. The Delosperma plant is called Ice Plant because their leaves appear to have ice crystals and they glisten in the sun and look like they are semi-transparent.

When you are planning to grow delosperma succulents
Here is the list of the most popular varieties of Delosperma succulents:

1. Cooper’s ice plant (Its scientific name is Delosperma cooperi) – This is the most common variety, it is also known as the purple ice plant. It is the first variety of the delosperma succulents that were introduced in the United States.

2. Delosperma Lavender Ice – A long live delosperma variety that produces pinkish-lavender flowers. It can be mixed with “Blut” because they both have deep purple foliage. This plant is developed by Perennial Favorites Nurseries Of Rye CO.

3. Hardy white (Delosperma herbeau) – This plant has white flowers that have exceptional beauty.

4. Blut (Delosperma ashtonii) – It is a long-blooming delosperma variety discovered in Arvada CO by Kelly Grummons. It has dark-green foliage and blooms flowers that are deep magenta. This plant’s foliage transitions into deep purple when the climate becomes cold. This plant is drought and cold-resistant making it a perfect choice for individuals who live in hot and dry climates.

5. Hardy yellow – (Delosperma brunnthaleri) – This plant produces beautiful yellow flowers.

6. Starburst (Delosperma floribundum) – This plant blooms pink flowers with a white center.

Starburst

7. Lesotho Pink (Delosperma sp) – This plant has bright-green leaves and blooms pink flowers during early spring. This plant is native to the mountains of South Africa and can thrive in areas with higher elevations that have colder climates.

8. Alan’s Apricot (Ice plant Delosperma) – This plant is a hybrid, it is a variety of ice plant that has been developed by Alan Tower and has been available since 2016. This plant is extremely cold-hardy, it blooms bi-colored pink/apricot flowers during the summer months.

9. Red Mountain® Flame (Delosperma dyeri) – David Salman, a horticulturist, discovered it. This plant is an accidental hybrid that blooms reddish-orange flowers during springtime. This plant thrives well in very hot and dry regions. The Red Mountain® Flame is very cold hardy to zone 6.

10. Delosperma Fire Spinner® – This plant blooms flowers that have bright orange and deep purple colors. It blooms flowers during late spring. This succulent does not thrive in areas that have warm winters, it prefers cold weather and it is best to plant in areas that belong in the USDA Zones 5-8.

How to Grow and Care for Delosperma Succulents

1. Plant the delosperma succulents in a sunny area. Use a fast-draining soil; you can use sandy, sandy loam, or gravelly soils. If you live in drier climates, garden loam is preferable but make sure to avoid using clay soil.

Ice plants are like cacti. They do not like to stand in water and do not prefer rich soil. They grow best in dry sandy soil, and they can grow and spread easily. If you plant your delosperma plant in the moist-rich soil they can die because of root rot, this can occur during wintertime. You can prepare a soil mix by mixing peat, sand, perlite, soil, and compost.

2. Plant the delosperma succulents during mid-summer if you live in colder climates so they can be established before wintertime. For those who live in the Southwestern part of the USA, they have hot summer climates, so it is best to plant the delosperma succulents during fall.

3. Water the plants regularly especially during summertime, as Delosperma is a native plant in South Africa, they get summer rains. Keep the succulents dry during the wintertime. If you live in areas where the snow stays on the ground, you can use a frost blanket to cover the plants and keep their foliage and crowns dry. Get your frost blanket here.

Water the plants regularly especially during summertime

4. Delosperma succulents love gravel mulch, they tend to grow best when the stems grow over the top of the gravel, and this allows the roots to stay moist and the leaves and stems dry. You can also use fast-drying mulch materials like bark chips with medium texture or pine needles. You can allow them to dry out during the fall by stopping their irrigation so they can shrink down and harden before the wintertime comes. Actively growing delosperma plants are usually killed during the first hard frost.

5. During mid-spring, you must prune out any stems that are damaged in wintertime.

6. Use fertilizers during fall, you can use organic fertilizers. Ice plants can be prone to be killed during winter when it is fertilized frequently during the active season, they will keep growing during fall and they are prone to die during the wintertime.

7. Plant the delosperma succulents with 15-18 inches apart, but they can be closer if you have smaller rock garden varieties. You can place a little compost on each planting hole as well.

Warning: If you will plant your delosperma succulents in poor, dry soil they can spread rapidly and can become out of hand. They tend to grow aggressively and become an invasive plant in your garden.

Delosperma plants do well as landscaping plants along road embankments in areas with temperate climates. They can be used to control erosion. They can become invasive plants and affect other plants in your garden.

How to Propagate the Ice Plant

The Delosperma succulents can be propagated by using cuttings or planting seeds. You can also divide the plant and plant them in individual containers during springtime. You can take the cuttings during spring, summer, or fall. When growing them by seeds spread the seeds on top of the soil and make sure to not cover them because they need sunlight to germinate and grow properly.

Division – If you grow ice plants in containers, divide them easily when repotting them.

  • Remove the plant from the pot.
  • Divide the roots to form a few more separate plants.
  • Place the new plants in pots with a coarse, sandy potting mix that drains water fast.
  • Propagate your plants during springtime.
Cuttings – If you will propagate your Delosperma succulent using cuttings, you can do it any time. If you live in an area that becomes very cold during wintertime, get your cuttings in fall and bring them inside so they can survive the winter months.

Get your Delosperma succulent cuttings here.

Seeds – Planting the delosperma succulent is easy to do.

  • Rake the soil.
  • Water the soil moderately and scatter the seeds lightly.
  • Press the seeds into the soil.
  • Do not cover them because they need light to germinate.

Get your Delosperma succulent seeds here.

Planting the delosperma

How to Prune Your Ice Plantst

  • Prune your delosperma succulent during fall after the flowers fade.
  • This will prevent seed production and allow plants to conserve energy so they will have a vibrant appearance.
  • If there is dead or dry foliage, you must trim it. This will allow your plants to have a better appearance.
  • Some varieties of delosperma succulents can dieback, if this occurs, just trim it down and it will return and grow during springtime.

How to Water and Fertilize Your Ice Plants

How to Water and Fertilize Your Ice Plants

1. Water the ice plants after planting them. This way you can remove air pockets and allow the soil to settle on the roots of the plants. If there are pockets of air around the roots, this can cause them to dry out and die.

2. Water the ice plant with 1 inch of water every week. Do this during the first few months after planting them.

3. Use a watering can, soaker hose, or sprinkler. If you will be using a soaker hose or sprinkler you can set a 1-inch deep can next to the plant, turn off the sprinkler or hose when the can is full of water.

4. Reduce your watering regimen after the first few months of planting the delosperma succulent. It will not need supplemental water to survive after the first couple of months. The plants will begin to look a little rough; the leaves will turn yellow or brown and become withered. Give them 1 to 2 inches of water every 3 to 4 weeks to allow them to grow properly.

5. Do not water your Ice plants during wintertime. Cold wet soil can cause root rot and they can die from it.

6. Give fertilizer during springtime when they are actively growing. Use a balanced fertilizer, you can use 10-10-10 or 8-8-8.

7. Use 4 oz. of fertilizer for every 25 sq. feet of garden space. Sprinkle the fertilizer on the ground around the plants; be careful not to get any on the plants, as it can burn the leaves and stems of the Ice plants.

If you accidentally get any fertilizer on the plants, wash it with clean water. After spreading the fertilizer in the ground, you can water the plants so it can spread into the soil.

What are the Common Pests and Diseases of Delosperma Succulents?

Clay soil is not advisable to use when planting the delosperma succulent. If you don’t have a choice, you can mix the clay with compost and gravel so the plant can grow.

Watch out for aphids and mealybugs as they are the common pests that can attack your ice plant. Remove them by spraying water using a garden hose. If you have severely infested plants, you have to remove them and throw away so it will not affect other plants in the garden.

Watch out for aphids and mealybugs

Both aphids and mealybugs can be troublesome to your ice plants because they suck the juices from the plant and they can cause slow growth and yellow leaves can drop and this can kill your plants.

If you need more information about common pests and diseases of succulents, make sure to check our website.

Delosperma succulents are an excellent addition to any landscape or garden setting. Its foliage and flowers will help brighten your outdoor garden. It can also be used as ground covers or in areas with sandy seaside areas. You can use the delosperma succulent as an edger plant or you can also plant them in window boxes. This plant can also be used in rock gardens or as a trailing plant in containers. If you have xeriscapes, you can add your delosperma succulents on it as they can withstand drought and harsh climates.

Get your delosperma succulents here or here.

Are you planning to grow and care for Delosperma succulents? If you need more information about succulents and how to take care of them properly, Eden Succulents is the perfect place for you! We can teach you all the things about succulents.

If you need guides and other information please visit our website for more information. You can get all types of information so you can be successful in growing succulents at home. If this is your first time grow succulents, let us know any of your concerns, questions, or inquiries, we will do our best to help you out!

USA Pine Straw

USA Pine Straw

  • All Natural Beautiful Color
  • Covers up to 160 Sqft. (2-3 inch depth)
  • Excellent for Landscape Beds and Gardens
DELOSPERMA PURPLE ICE PLANT FLOWER SEEDS

DELOSPERMA PURPLE ICE PLANT FLOWER SEEDS

NEW! 50+ DELOSPERMA PURPLE ICE PLANT FLOWER SEEDS /PERENNIAL
Fluker Labs Repta-Bark

Fluker Labs Repta-Bark

  • Prevents excessive moisture and absorbs waste
  • Natural bedding for all high humidity loving reptiles
The Best Succulent Gardens in The World

The Best Succulent Gardens in The World

The love and interest in succulents are continuously growing. Succulents continue to take over our social media timeline. Just by typing in the hashtag “succulents,” on Instagram, Pinterest, or even Twitter, you get millions of results. You see people putting in their first succulent in their living room, or you see dozens of tutorials for newbie succulent growers.

Even in the homes of the people, we see that the succulents are the absolute go-to plants of homemakers. Their stunning beauty definitely adds an instant aesthetic wherever you put them may it be in the outdoor garden, the living room, or your office.

The Best Succulent Gardens in The World
A single succulent plant can give you a certain kind of relief. What more being surrounded by a whole garden of succulents with different shapes, sizes, and colors? That would be a day you wish would never end. That is why, in this lifetime, make sure to visit a succulent garden in the world. Make it two succulent gardens! Aside from they are an instant Instagram-worthy post, you will love the air that you breathe and will be given positivity that will last you a long time.

Here are the top 6 best succulent gardens in the world that you definitely need to visit. These are in no order, so visit any garden of your choice! Or why not visit all of them?

Remember that cacti are a type of succulent. Therefore, all cacti are succulents. However, not all succulents are cacti. This specific garden only grows cacti, but they are as beautiful as ever.

This Cactus Garden displays dozens of varied species of cacti mixed with a couple of non-flowering succulents. You will love their outdoor garden and their accessible walkway that will lead you around their cacti garden. For directions click this link.

1. Ethel M Chocolates’ Botanical Cactus Garden (Henderson, Nevada)

Who knew you can have both the delight of eating chocolate while enjoying the succulent scenery? Ethel M Chocolates’ Botanical Cactus Garden offers that kind of delight to its visitors.

As you indulge yourself in their luxury sweets, you also get to tour around one of the largest cacti gardens in the state. They feature more than 300 species of cacti and other succulents. This is certainly a safe haven for succulents lovers like you and me.

2. Marie Selby Botanical Gardens’ Succulent Garden (Sarasota, Florida)

If you find yourself wandering in Florida, Marie Selby Botanical Gardens’ Succulent Garden is absolutely the place to be. In the region, they are known for having the most beautiful succulents on display. What is even more interesting is that they devote an area of their grounds to a desert-focused succulent garden. So if you have that special love for desert succulents, this is the perfect succulent garden for you to visit. Put it on top of your list!

This garden is open daily from 10 a.m. to 5 p.m. except during the Christmas Holidays.

3. Abbey Brook Cactus Nursery (Matlock, United Kingdom)

Let us head on over to north-central England, the United Kingdom. Knowing the origin of succulents in areas with long dry seasons, you might be wondering, “What are they doing in the United Kingdom?” Interestingly enough, they are thriving. In fact, Abbey Brook Cactus Nursery is known to be the first commercial succulent grower to put off dealing with field-collected plants.

This nursery is located in the center of Great Britain. Therefore, it is a perfect side trip that you must include in your itinerary!

4. Cactus Country (Strathmerton, Victoria, Australia)

You heard it right! Cactus Country. Australia might not be far away from your hometown, but if you are that hardcore succulent grower and lover, you will definitely not mind the distance.

Cactus Country is able to gather succulents from all over the succulent-producing world such as Mexico and the Sahara to create a beautiful cactus landscape. As you walk around this garden, you will find yourself in a succulent-dream and you would not want to wake up from it.

Do you know any succulent gardens that can make it to this list? Share them with us. Feel free to leave a comment about your own experiences with succulent gardens. And if you’re looking to try a hand at growing your own succulent garden, check out the rest of our information hub for more information on how to get started today!

How To Make A Succulent Wreath

How To Make A Succulent Wreath

The best holiday decorations are the ones you make by yourself or with your relatives and friends. Gather round because we are going to share with you how to make your own succulent wreath.

That is right! We are using succulents. Where have you seen succulents in wreathes? It is definitely not a usual sight to see. That is why succulents are the best plants to use for your wreathes because they can give your house a unique look among the rest. The boldness of the succulents will definitely give you that zing to decorate for the holidays.

How To Make A Succulent Wreath

Supplies Needed

Before we go with the step-by-step process of making your own succulent wreaths, let us first discuss what supplies you will be needing to achieve the perfect succulent wreath.

● 8-inch Straw Wreath
We recommend that you use this wreath from Amazon:

FloraCraft Straw Wreaths
You might want to make a lot of these wreaths and you probably want to experiment with different designs. With that, it is important to use biodegradable wreaths. This is also the ideal wreath for both indoor and outdoor displays. Go check their prices!

● Floral Greening Pins (2 packs)
These greening pins are sometimes called fern pins. They have an unusual form. They do not look like safety pins at all. These pins are used in floral arrangements or other crafting activities. We use these greening pins to attach leaves or moss to floral foam or Styrofoam bases.

● Moss
For the moss:
What’s best about this moss from Amazon is that they are long-lasting because the freshness of this moss is preserved. This is very ideal for experimenting on your designs weeks ahead before Christmas.

Deer Moss
It is best to use 5 cubic inch deer moss. Check this out:

Succulents
Tub for Soaking Moss
Wide Ribbon (Burlap)

Steps in Making Your Succulent Wreath

Steps in Making Your Succulent Wreath

1. Gather Your Supplies
After all the supplies needed have been determined, the very first step is to gather them all. Make sure that you do not miss a single piece of material. Of course, you will also need supplemental craft tools such as scissors.

2. Soak The Moss
After gathering your supplies, get the moss and tear it down into pieces that are smaller than your palm. After that has been done, soak the moss down in water using a bucket or a tub. Remember, only soak the moss and not the deer moss.

3. Grab One Piece of Moss
Grab one piece of moss and squeeze the water out. Take the greening pins and start attaching the moss to the inside portion of the wreath. Just poke it in. Continue doing so until the inside is complete.

4. Fill the Outer Portion
Once the inside portion has been filled, proceed to the outer portion. Just repeat the same method. Once this has been done, you now have space in the middle to put your succulents in!

5. Prepare Your Succulents
Carefully remove as much dirt from the roots of each succulent that you are going to use. Once you have removed all the dirt, swish the plants in water to remove any excess dirt you may not have removed.

6. Line Your Plants Up
Once you have cleaned all the plants that you are going to use, line them up. This is important so you can decide which plants you are going to use and what order they are in the succulent wreath.

7. Putting In The Succulents
Use a floral pin in putting the succulents in your succulent wreath. Just position the succulent in the wreath, wherever you want it to be, and push the pin to hold the succulent to the base. Be careful not to poke the plant! Continue to place all your succulents until you have successfully filled the whole wreath.

8. Mist Your Wreath
Mist your wreath and then lay it flat for about a week. It is important not to hang your wreath immediately. Keep them out of the sunlight for a week as well.

These steps are as easy as 1-2-3, right? If you want visuals for the step-by-step process, check out this neat video by Grow Organic Peaceful Valley:

Share with us what you have done! Send it in here in Eden Succulents. Have a Succulent-y Holiday!

Quality Growers QG2060 Preserved Reindeer Moss

Quality Growers QG2060 Preserved Reindeer Moss

  • Use it in dioramas exhibits soil cover in gardens lignin in hanging baskets or even alone
  • 5 cubic Inch of preserved reindeer moss in spring green
  • Made in USA